

Let’s say you have a Cloud VM lying around with, it is entirely possible to turn it into a personal proxy for your internet traffic. It is probably not going to help you unlock region-protected content since services like Netflix and Hulu would probably have blocked the IP range operated by hosting service providers, but it may still be useful in cases where you need to get around your ISP’s slow network transit and peering issues.
Personally, I prefer SOCKS5 proxy because it is able to proxy both TCP and UDP traffic. If you’re using an HTTP/S proxy, only TCP traffic can be proxied.
The proxy of choice is Dante – it’s available in the Ubuntu package repository and is extremely lightweight and easy to configure. Start by running the following command as root:
apt-get install dante-server
By default, it would create a system service and attempt to run it right after installing, but you would see failure messages as the default configuration is not properly setup.
Next, edit the configuration file /etc/danted.conf and replace it with the following minimum configuration:
logoutput: stderr
internal: 0.0.0.0 port = 3128
external: eth0
socksmethod: none
clientmethod: none
user.unprivileged: nobody

client pass {
        from: 0.0.0.0/0 to: 0.0.0.0/0
        log: error connect disconnect
}
client block {
        from: 0.0.0.0/0 to: 0.0.0.0/0
        log: connect error
}
socks pass {
        from: 0.0.0.0/0 to: 0.0.0.0/0
        log: error connect disconnect
}
socks block {
        from: 0.0.0.0/0 to: 0.0.0.0/0
        log: connect error
}
This would set up a SOCKS5 proxy listening on port 3128, that will accept and forward all incoming request.
Hardening
It is not a good idea to expose your proxy to the public even if you don’t mind the traffic consumption. For one, any fraudulent acts done behind that IP address could be easily be traced back to you. Thus you may want to limit requests coming from specific IP addresses. You can do so by replacing the 0.0.0.0/0 CIDR in the from: directive of the client pass {} block with the network subnet to be permitted in the config file. There can be multiple client pass blocks:
client pass {
        from: 1.1.1.1/32 to: 0.0.0.0/0
        log: error connect disconnect
}
client pass {
        from: 192.168.1.0/24 to: 0.0.0.0/0
        log: error connect disconnect
}
In the above example, Dante would only process proxy requests coming from 1.1.1.1 and 192.168.1.1 ~ 192.168.1.255, while discarding the rest.
You could also restrict access by using the network security group interface provided by your cloud service provider, or through the OS firewall settings within the cloud VM.
Start the proxy and start using
After you are happy with the config file, save the changes, and restart the Dante service as root:
service danted restart
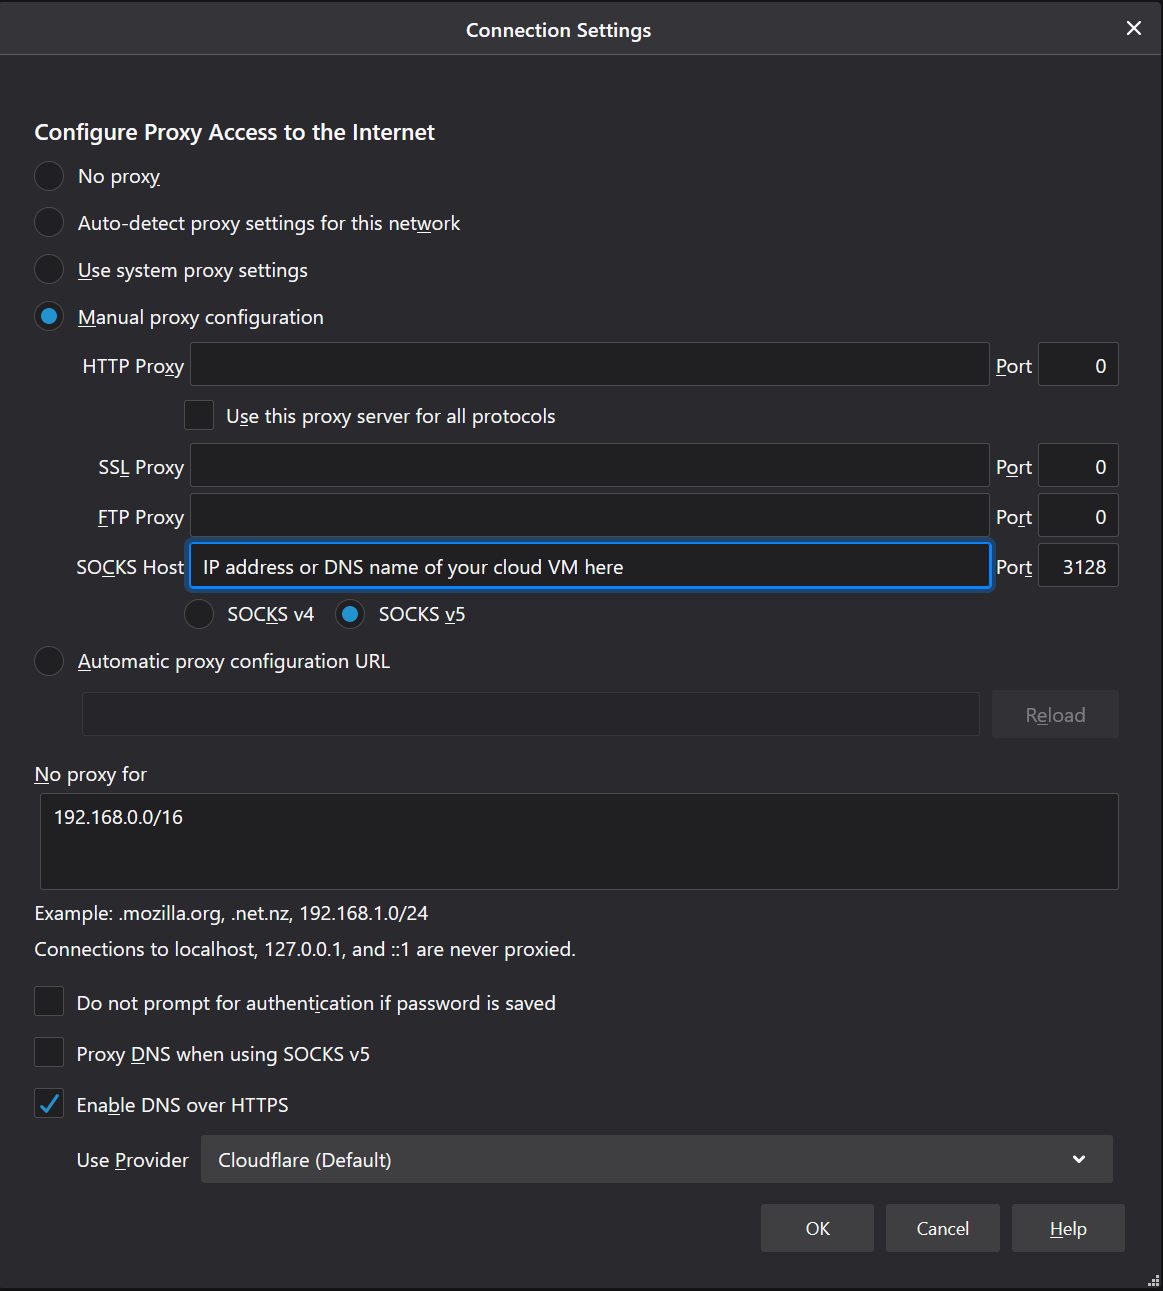
Then in your browser or application, update the SOCKS5 to point to ip_addr:3128. Note that Edge and Windows 10 only supports HTTP proxy. Chrome in Windows relies on the OS settings and hence it also doesn’t work with SOCKS5 proxy. You can use Firefox or a third-party tool such as Proxifier to pipe the traffic through the proxy.
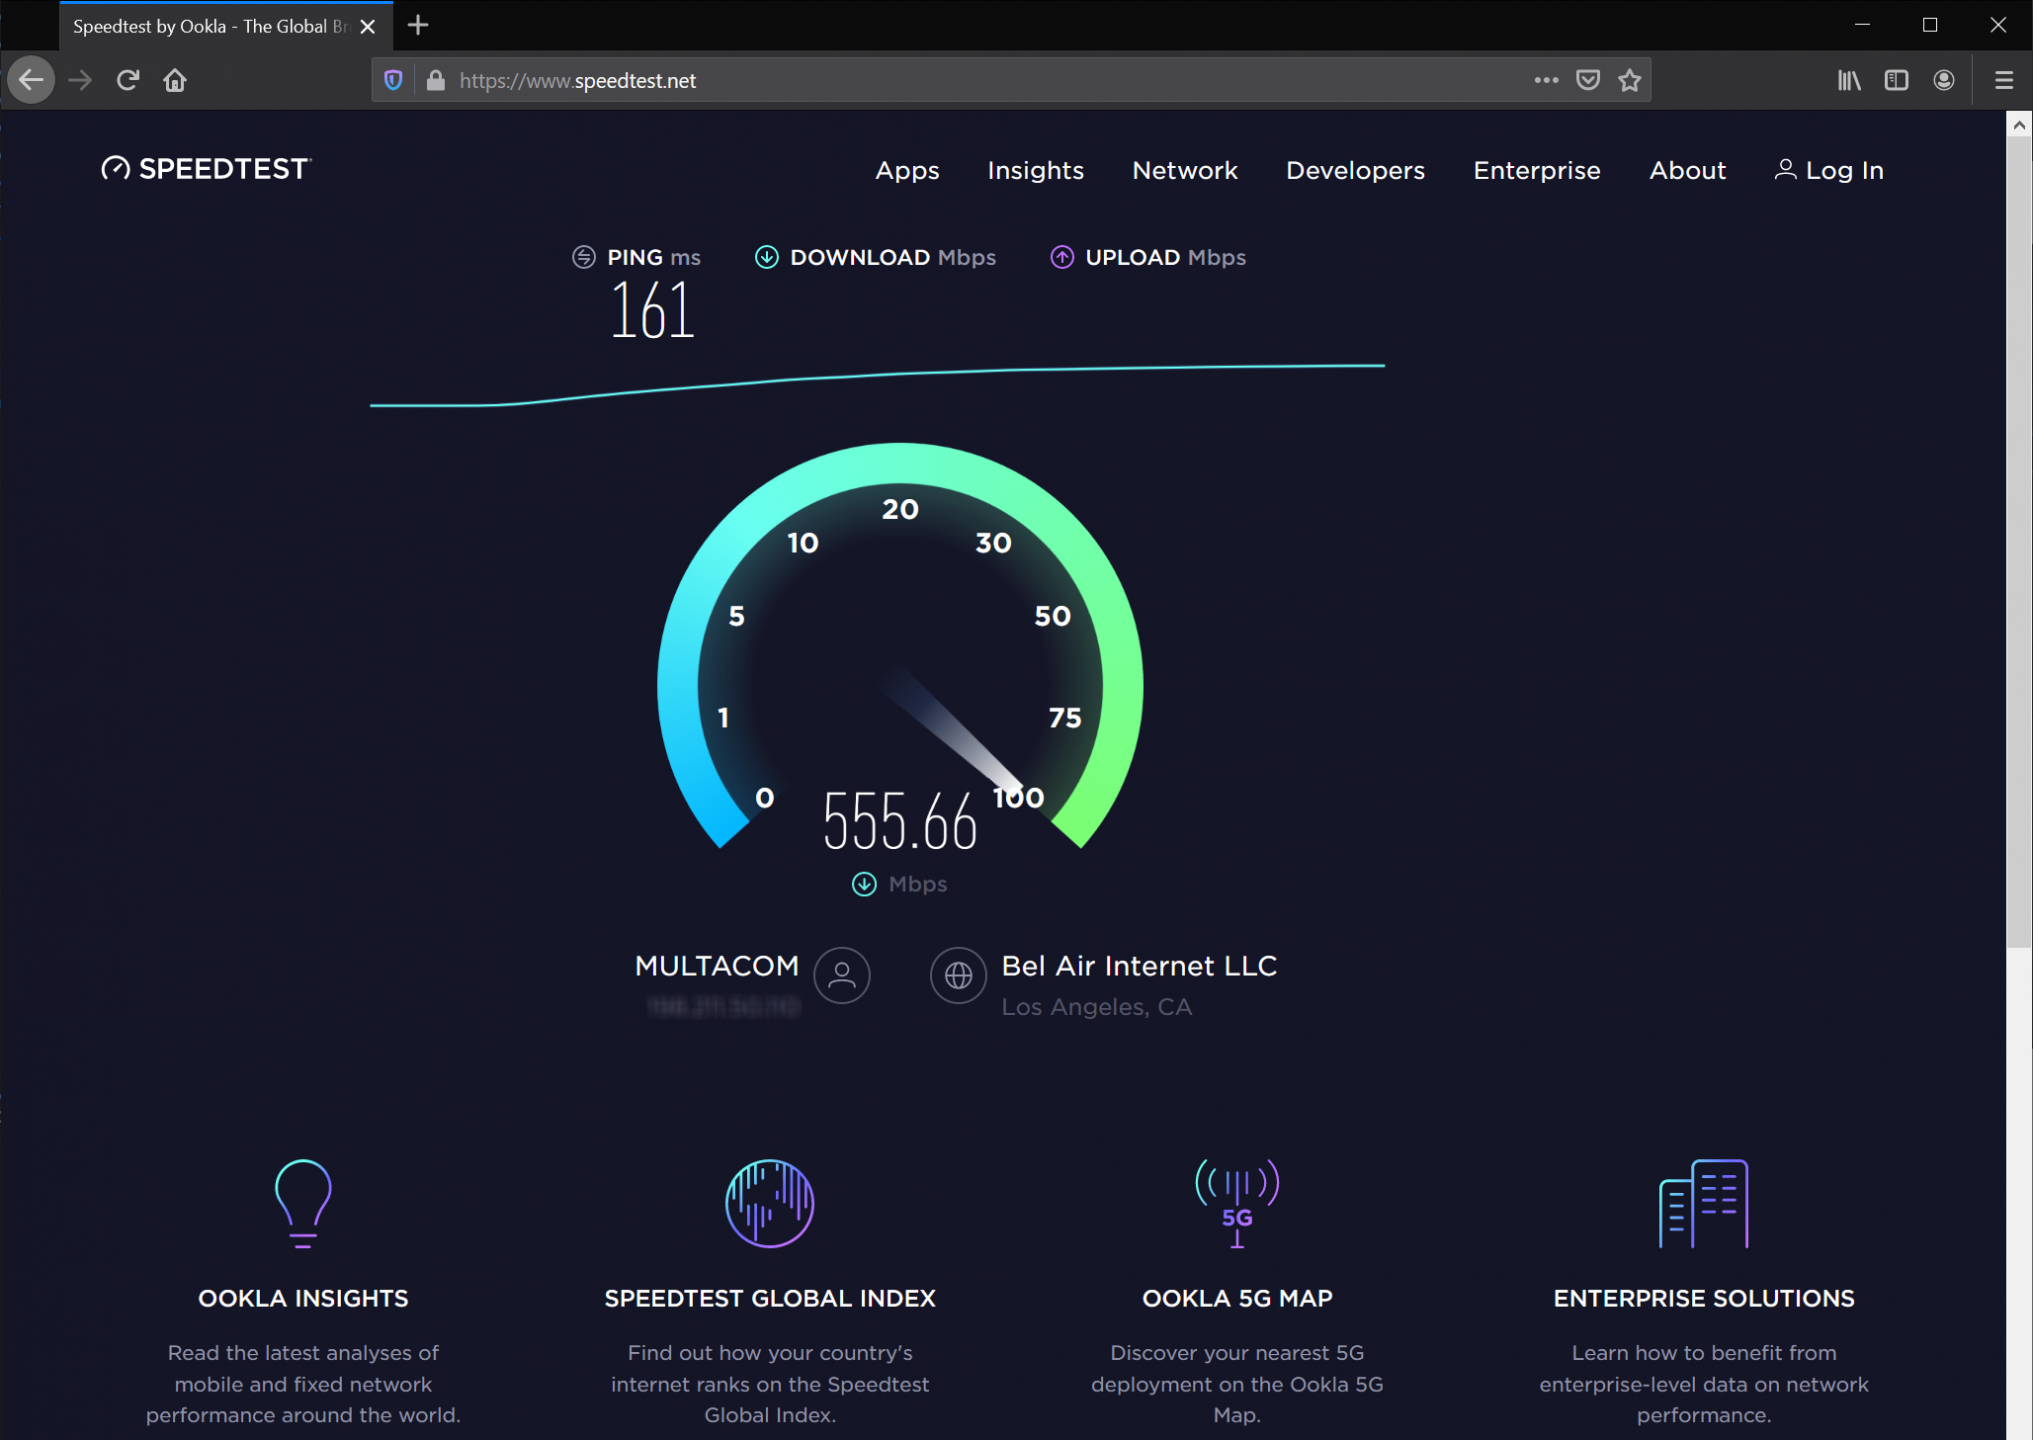
It’s high time to run a SpeedTest hereafter
Once everything is confirmed to be working, you may want to auto-run Dante at system startup:
systemctl enable danted
Security disclaimer
It is worth noting that the connection between you and the SOCKS5 proxy is not encrypted, so sensitive information will be transmitted in plain text within that network segment and interception may take place. However, it is 2019 and most websites are now SSL enabled, security risk would be low, especially if you have total control of the server running the SOCKS5 service.
Leave a Reply