Your cart is currently empty!
-
Sync Your Tampermonkey Userscripts to iCloud on macOS
Tampermonkey is a popular userscript manager, but Microsoft Edge does not sync your installed scripts across Macs. By default, only the extension itself is synced via your Microsoft account. Fortunately, with a small trick using iCloud Drive and symbolic links, you can keep your Tampermonkey scripts in sync between multiple Macs. -
在 Debian 系统中开启自动安全更新(Auto Patching)
在 Ubuntu 系统中,很多人习惯使用 Ubuntu Pro 或 Livepatch 来获得自动安全更新。但在 Debian 系统里,并没有完全一样的官方服务。不过,Debian 提供了一个非常成熟的工具 —— unattended-upgrades,可以帮助我们实现类似的功能:自动安装安全补丁,减少手动维护的工作量。
下面就带大家一步一步开启 Debian 的自动安全更新。
一、为什么要启用自动更新?
- 提高安全性:Debian 的安全团队会不断发布安全补丁,修复漏洞。如果不及时更新,系统可能暴露在攻击风险中。
- 降低维护成本:自动下载并安装更新,管理员无需每天手动运行 apt upgrade。
- 稳定性可控:通过配置,可以只允许「安全更新」自动安装,避免大版本升级导致兼容性问题。
二、安装必要的组件
Debian 默认自带 unattended-upgrades 包,如果没有,可以手动安装:
sudo apt update sudo apt install unattended-upgrades apt-listchanges
- unattended-upgrades:负责自动下载和安装更新
- apt-listchanges:在更新前显示 changelog(可选)
三、启用自动更新
运行配置命令:
sudo dpkg-reconfigure unattended-upgrades
选择 Yes 之后,系统会自动在 /etc/apt/apt.conf.d/20auto-upgrades 中写入默认配置,例如:APT::Periodic::Update-Package-Lists "1"; APT::Periodic::Download-Upgradeable-Packages "1"; APT::Periodic::AutocleanInterval "7"; APT::Periodic::Unattended-Upgrade "1";
这里的数字代表天数:
- 1 = 每天
- 7 = 每周一次
-
Keeping FRP Up to Date with a One-Line Script
If you run reverse proxies or tunneling setups on your homelab or servers, chances are you’ve come across FRP (Fast Reverse Proxy). It’s an open-source project that makes it easy to expose services behind NAT/firewalls via a client (frpc
) and a server (frps
).
The project is very active, and new releases roll out often. But keeping your binaries (/usr/local/bin/frps
,/usr/local/bin/frpc
) updated across multiple servers can be a hassle — especially if you’re running them under systemd instances like[email protected]
,[email protected]
, etc.To solve that, here’s a simple script you can drop into
/usr/local/bin/frp-update
. It will:- Check the latest release on GitHub
- Compare against your currently installed version (
frpc
first, thenfrps
) - Download and install the new binaries if needed
- Leave your running services untouched (you can restart them manually when ready)
-
Upgrading VMware ESXi via ESXCLI
We can upgrade our existing ESXi host using the command line. I would recommend doing it over SSH since it would allow better cut-and-paste operations, but the web prompt would work equally well.
The latest version at the time of writing is 8.0U1a, which is identified by the image name
ESXi-8.0U1a-21813344
. The commands to upgrade your ESXi host using the standard profile would therefore be:esxcli network firewall ruleset set -e true -r httpClient esxcli software profile update -d https://hostupdate.vmware.com/software/VUM/PRODUCTION/main/vmw-depot-index.xml -p ESXi-8.0U1a-21813344-standard
After a few minutes, the command line upgrade will show “The update completed successfully.” You will also see the recommended action “Reboot Required: true” being displayed.
-
Fix: NO_PUBKEY error when installing ookla/speedtest-cli on Debian 11
You’re here probably because you tried to use install the official Ookla Speedtest client in Linux, and failed. When you do an
apt update
you will be presented with the following error:W: GPG error: https://packagecloud.io/ookla/speedtest-cli/debian bullseye InRelease: The following signatures couldn't be verified because the public key is not available: NO_PUBKEY 8E61C2AB9A6D1557 E: The repository 'https://packagecloud.io/ookla/speedtest-cli/debian bullseye InRelease' is not signed. N: Updating from such a repository can't be done securely, and is therefore disabled by default.
This happens because, unfortunately, the installation script did not put the public cert that is used to verify the signature of the repository at the correct place, when you’re running Debian Bullseye.
To fix this issue, first create an empty folder (if it isn’t already there), and make sure it has read and execute access for everyone and also write access for the owner (aka 0755):
mkdir -p /etc/apt/keyrings chmod 755 /etc/apt/keyrings
Then add the GPG public key to the newly-created folder:
curl -fsSL https://packagecloud.io/ookla/speedtest-cli/gpgkey | gpg --dearmor > /etc/apt/keyrings/ookla_speedtest-cli-archive-keyring.gpg
Note that
/etc/apt/keyrings/ookla_speedtest-cli-archive-keyring.gpg
is actually specified in the repository file,/etc/apt/sources.list.d/ookla_speedtest-cli.list
. If you have saved the .gpg file in a different name, be sure to also modify the references in the .list file. -
CoinTickr Setup Guide
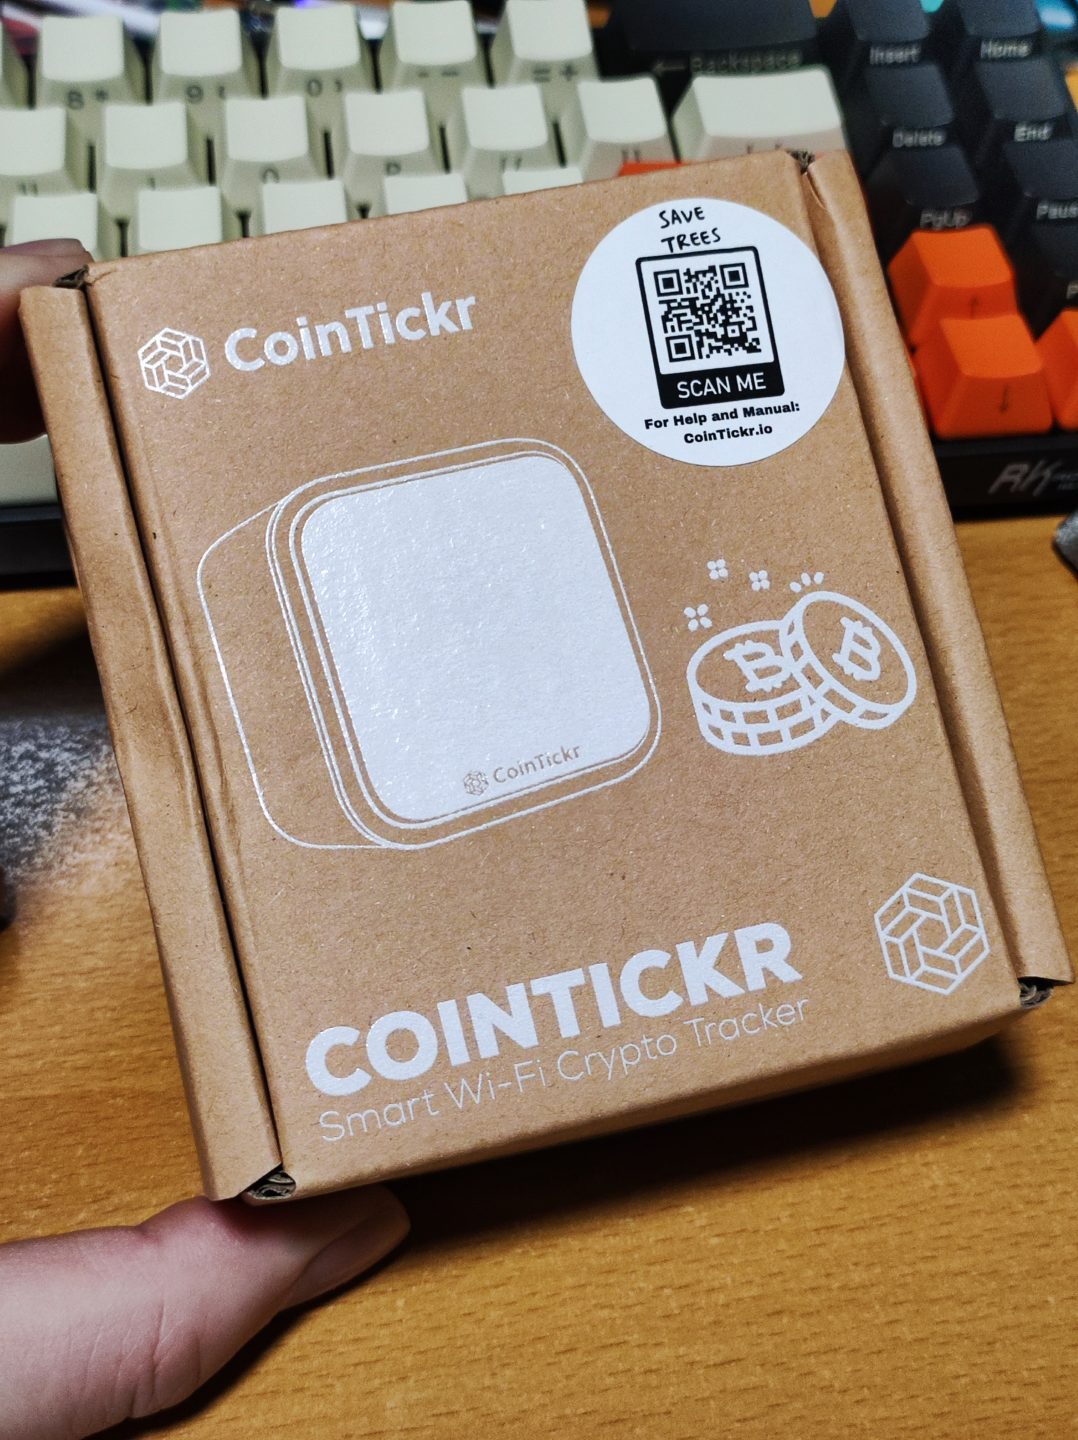
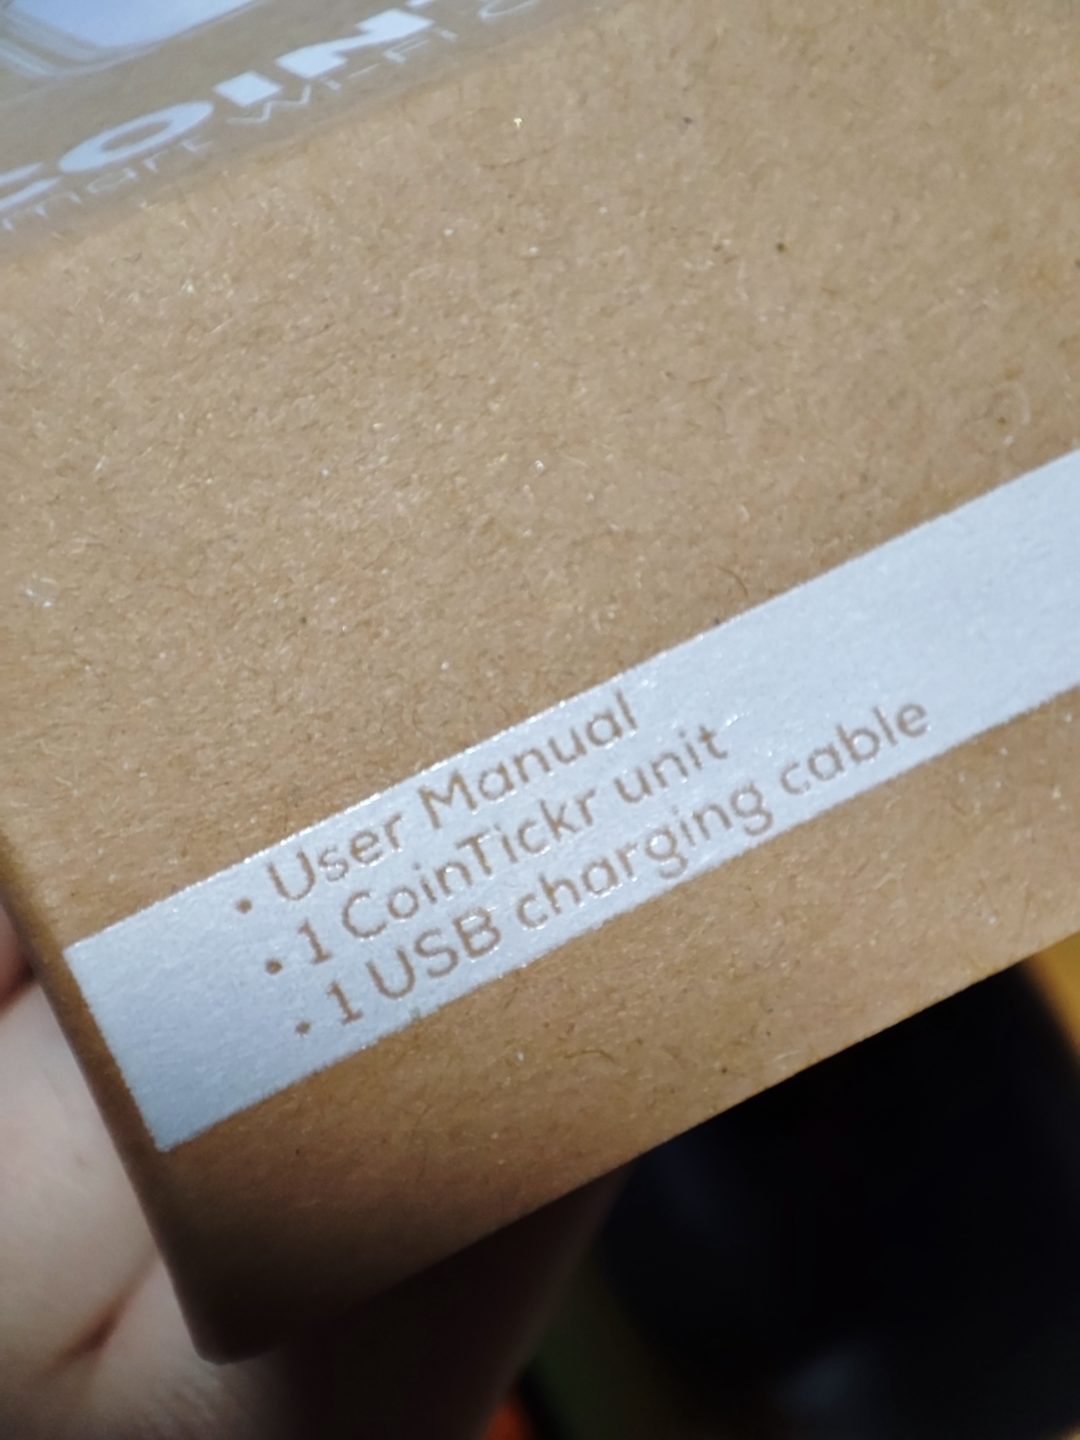
Finally received my Kickstarter-backed CoinTickr, onlyt to realize it doesn’t come with a user manual, even though the packaging clearly states otherwise. The QR code teleports you to the cointickr.io site, with no sight of setup instructions besides a ton of marketing stuff on its Indiegogo campaign right now, which is lame.
Fortunately, for someone with an immense number of IoT devices, it ain’t rocket science to figure it out. I’m putting together a quick guide so that you can get yours up and running in a jiffy.
Nope, that User Manual bullet point is a blatant lie - If you see BTC/USDT 88,888, the device should already be broadcasting a Wi-Fi network named Coinstats. It is a 2.4Ghz network that can be joined without password. Get on that network with your mobile device or laptop. If you are not seeing this network, try a different device, or long press the top button on the CoinTickr to enter configuration mode. If you are using your mobile phone, it would help to temporarily disable your mobile internet.
- You should be assigned an IP from the
10.10.0.0/24
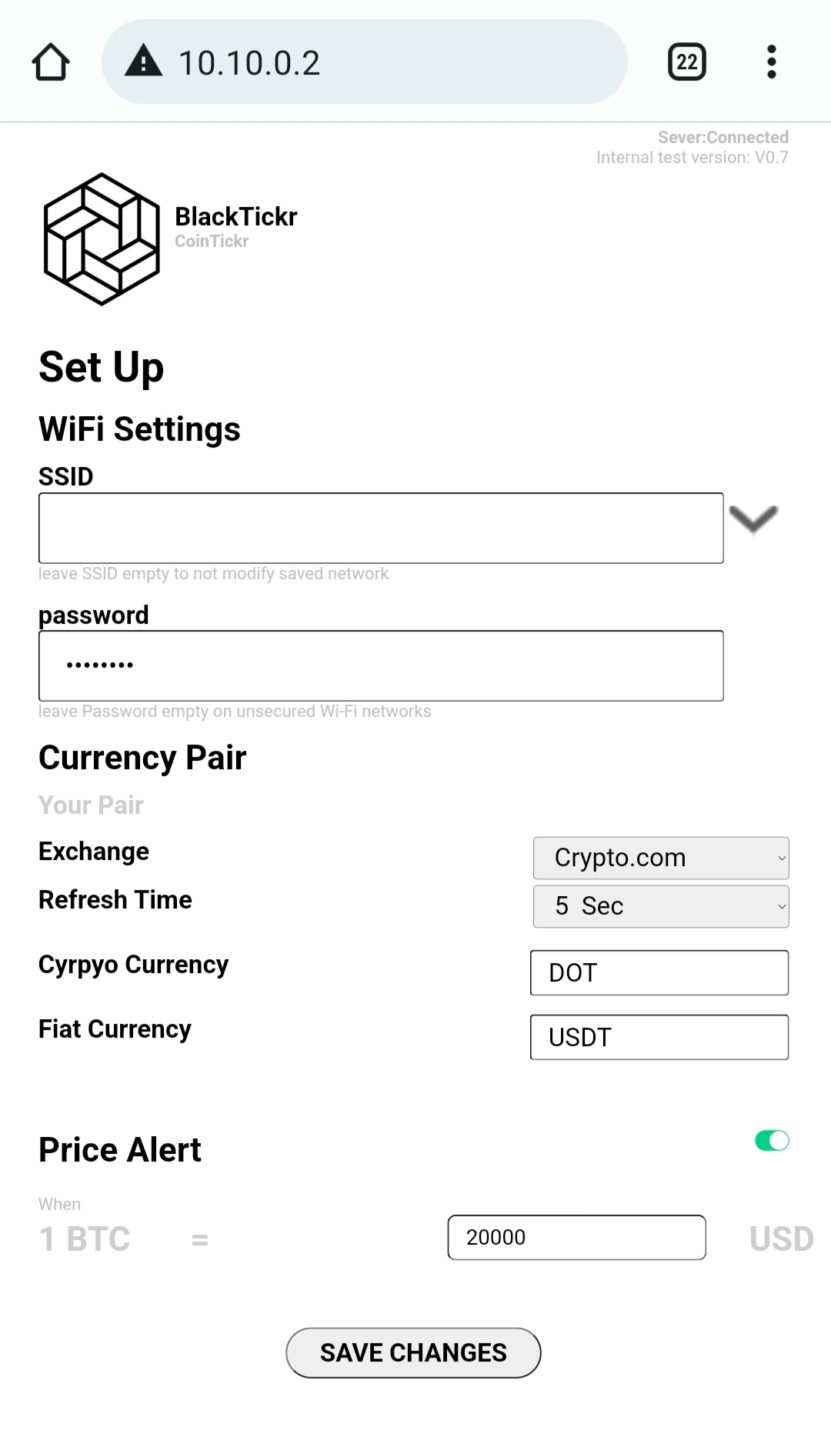
subnet. Your device is likely to prompt you “no internet”, which is ok. - Fire up your browser of choice, and key in http://10.10.0.2 in the address bar.
- You will be presented with the admin page.
- Pick your Wi-Fi network from the list (2.4Ghz only!) and supply the password. Key in the coin/fiat pair and hit the Save Changes button.
- You’re all set!
- The Coinstats Wi-Fi will be disabled at this point and if you want to update the settings in the future, simply long-press the top button and repeat step 3-5.
-
HEVC Video Extensions for Windows 11, free from Microsoft Store
If you have installed a fresh copy of Windows and attempted to play an H.265-encoded 4K UHD movie file, chances are you will be prompted to purchase this HEVC extension for S$1.50.
However, there is actually a free version of this extension that is not searchable from the Microsoft Store.
You’re welcome.
-
Setting up Cloudflared, the DNS-over-HTTPS client, the correct way
DNS over HTTPS (DoH) is a protocol for performing remote Domain Name System (DNS) resolution via the HTTPS protocol, which prevents eavesdropping and manipulation of DNS data by man-in-the-middle attacks by employing HTTPS encryptions between the DoH client and the DoH-based DNS resolver. At the time of writing, the official guide at Cloudflare is broken, as the
cloudflared service install
command would fail to complete. This article walks you through the process of setting up DoH on your Debian 10 system. -
Building the latest Windows 10 Enterprise VL USB installer from scratch
If you are a Microsoft Volume License customer, the usual channel for obtaining creating a bootable USB for OS installation is to obtain the ISO images via the Volume License Service Center (VLSC) or Microsoft Business Center (MBC), and then using tools such as Rufus or the good old Windows USB/DVD Download Tool to write the ISO to USB. However, there exist situations whereby you can’t get hold of the ISO in a timely fashion, such as when the person with the download rights went on leave, or that a new release is not yet available for download. In this article, I’ll show you how you can build a bootable USB drive with the latest Windows 10 Enterprise release from scratch with just the Media Creation Tool from Microsoft.
(more…) -
Safely upgrade from Debian 9 to Debian 10
It is jarring when you come across VPS providers in mid-2020 and they only provide up to Debian 9 (or Debian 8) for the OS image. Fortunately, it can be easily upgraded via a few commands, as depicted in this article.
(more…)